Quiz Magnets Documentation & Tutorials
Quiz Entries
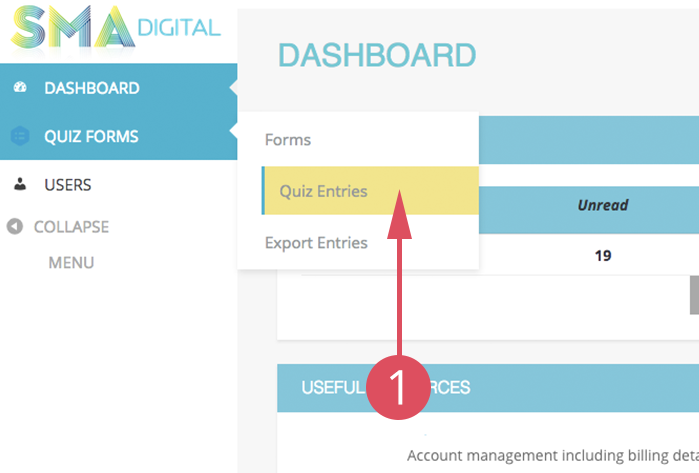
How to view entries
- In your dashboard, hover over “Quiz Forms” in the left-hand admin menu, and then click on “Quiz Entries”.
- You can sort and view the entry dates at the top right of the screen. Once you have found your entry, hover over the entry date and click onto the “View” button.

- Within the entry, you can view all completed entries, make notes and more. To view individual confirmation pages, click on “View Page” next to Confirmation URL.
- To view individual PDF reports, click on the “View” button.

- You can re-send the email notifications to yourself, to your client, or to someone else. To re-send the confirmation email, click on the checkbox next to “Email to
client after completion” within the “Notifications” box on the right-hand side. - You can also specify who you send this email to in the “Send To” box and complete the action by clicking the “Resend Notifications” button.

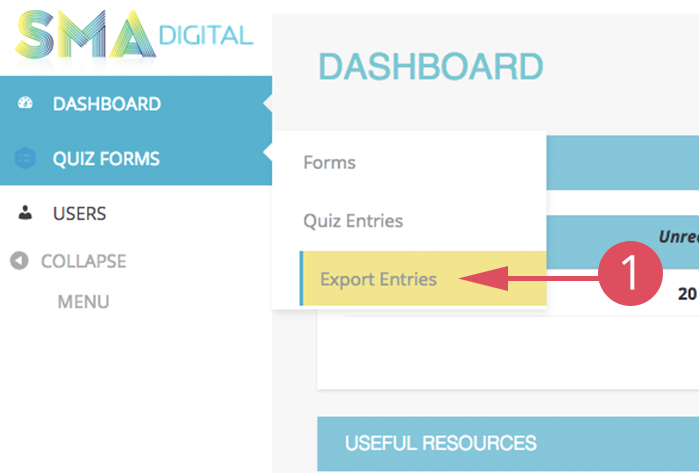
How to export entries
You can export all completed entries or export a specific date range of completed entries to an MS Excel readable database file.
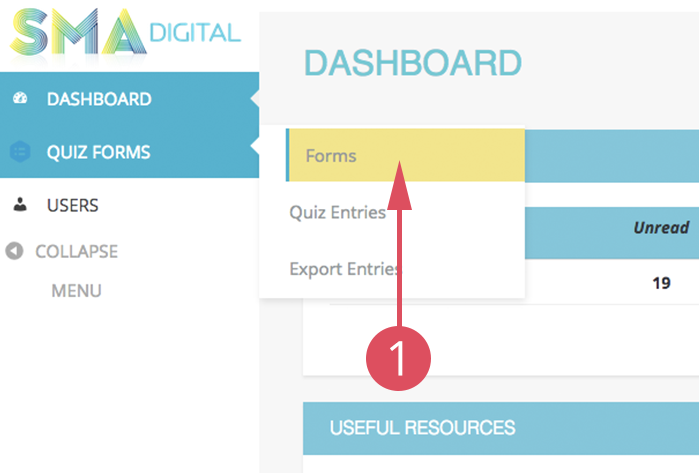
- Within your admin dashboard, hover your mouse over “Quiz Forms” in the left-hand menu, and then click on “Export Entries”.
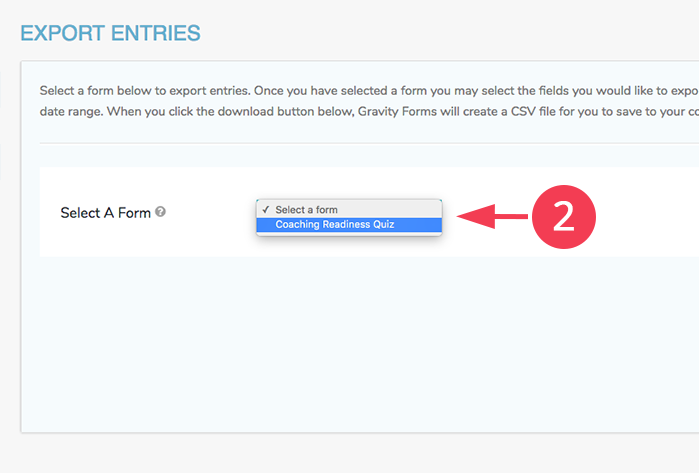
- Click the drop-down list and click on the name of your Quiz.
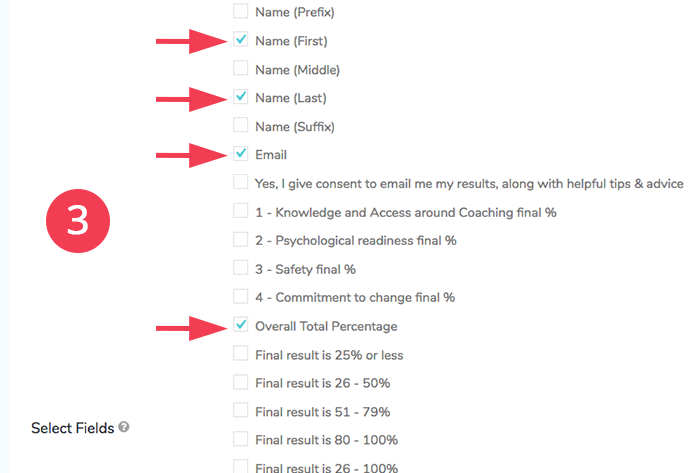
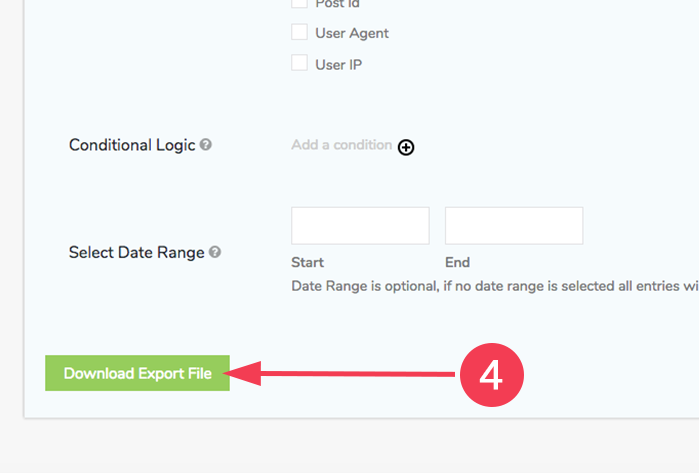
- You can then select any of the fields to include in the export including all answer fields, if desired. In the example below, we have included the First and Last name, Email and final overall answer as a percentage.
- Once you are ready, click on the “Download Export File” button to generate the export file.
Making Edits and Changes
How to make text changes to questions or answers
- Start by navigating within your admin dashboard log in area and hover over “Quiz Forms” then click on “Forms” in the left-hand menu as pictured below.
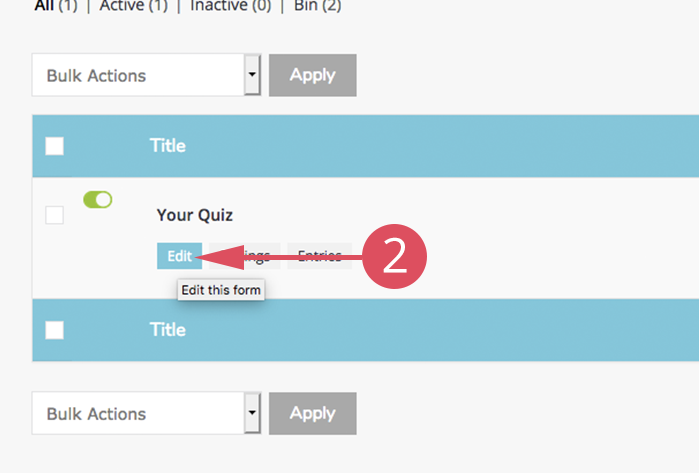
- On the next screen, hover over the Quiz title and click onto “Edit”.
- Find the question that you wish to modify (be careful not to delete any questions!), and click on the top down arrow to load up its options.
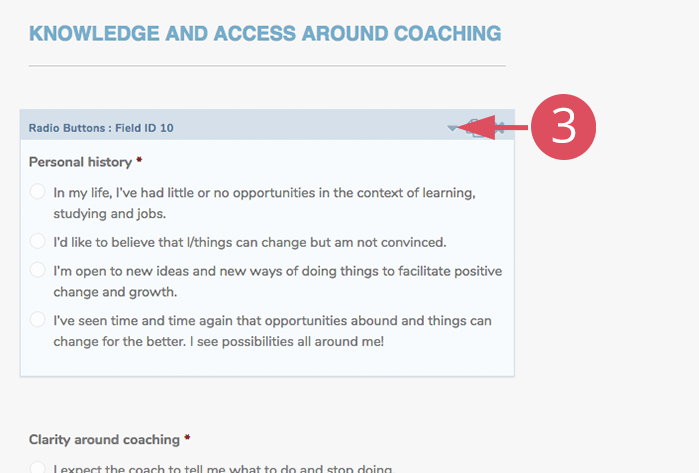
- If you wish to change the question title, you can modify the text within the box under “Field Label”.
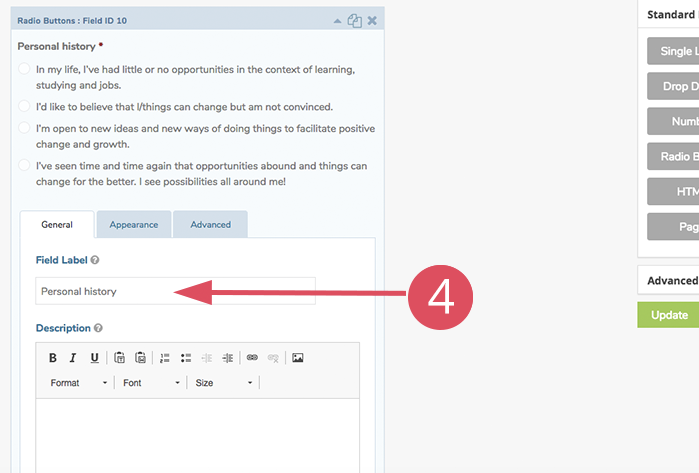
- If you want to modify the answer text, you can edit the “labels” below with value’s 1-4. Simply click on the text and type. Please don’t modify the ‘Value’ number to the right-hand side of the text.
- Once you are done, press the green “Update” button to save.

How to edit the call to action text
- Start by navigating within your admin dashboard log in area and hover over “Quiz Forms” then click on “Forms” in the left-hand menu as pictured below.
- On the next screen, hover over the Quiz title and click onto “Edit”.
- Scroll down (about halfway down the screen) until you find the section called “Call to Action Text”.
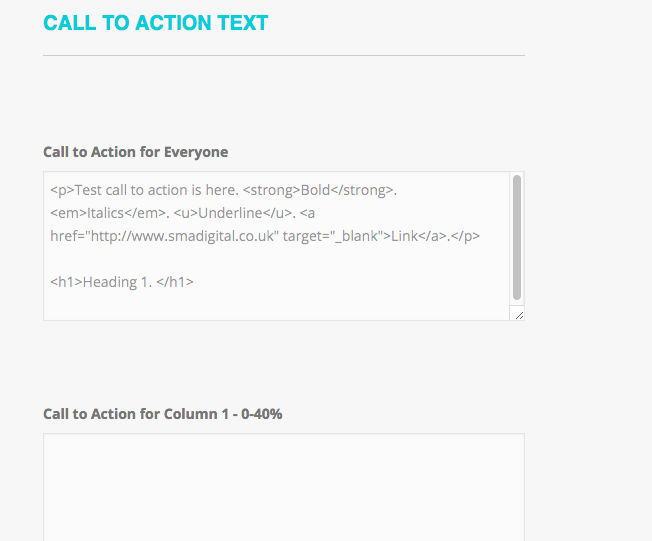
- Find the call to actions that you wish to modify (be careful not to delete any!), and click on the top down arrow to load up its options.
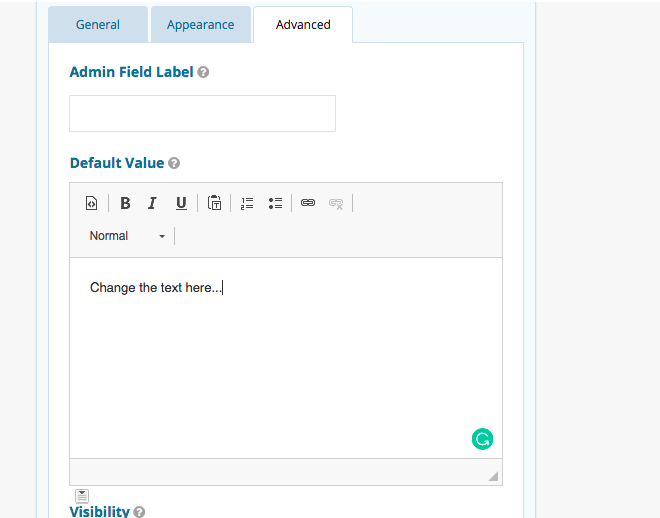
- Click on the “Advanced” tab.
- Edit the text as you see fit.
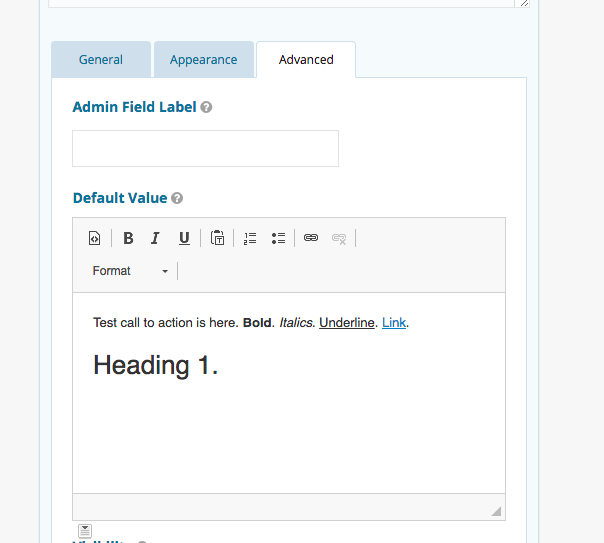
- Once you are done, press the “Update” button on the right hand side of the screen.
How to edit the results feedback text
- Start by navigating within your admin dashboard log in area and hover over “Quiz Forms” then click on “Forms” in the left-hand menu as pictured below.
- On the next screen, hover over the Quiz title and click onto “Edit”.
- Scroll down (about halfway down the screen) until you find the section called “Overall Results Feedback Text”.
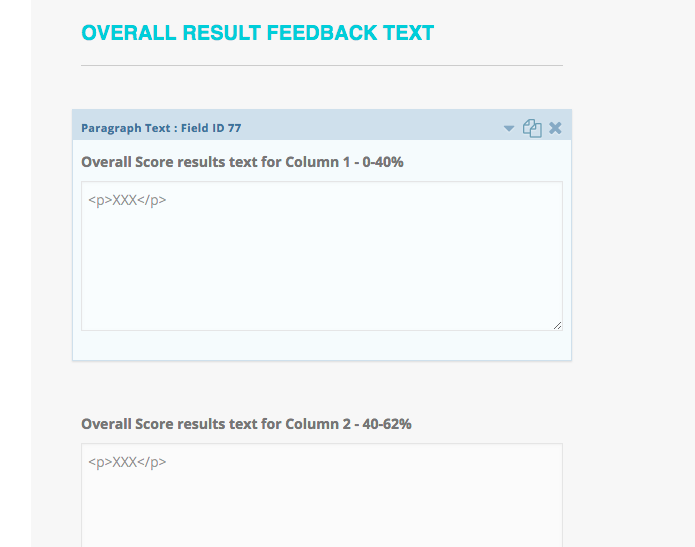
- Find the overall results column text that you wish to modify (be careful not to delete any!), and click on the top down arrow to load up its options.
- Click on the “Advanced” tab.
- Edit the text as you see fit.
- Once you are done, press the “Update” button on the right hand side of the screen.
How to edit the detailed feedback text
- Start by navigating within your admin dashboard log in area and hover over “Quiz Forms” then click on “Forms” in the left-hand menu as pictured below.
- On the next screen, hover over the Quiz title and click onto “Edit”.
- Scroll down (about halfway down the screen) until you find the section called “Per Topic/Question Result text”.
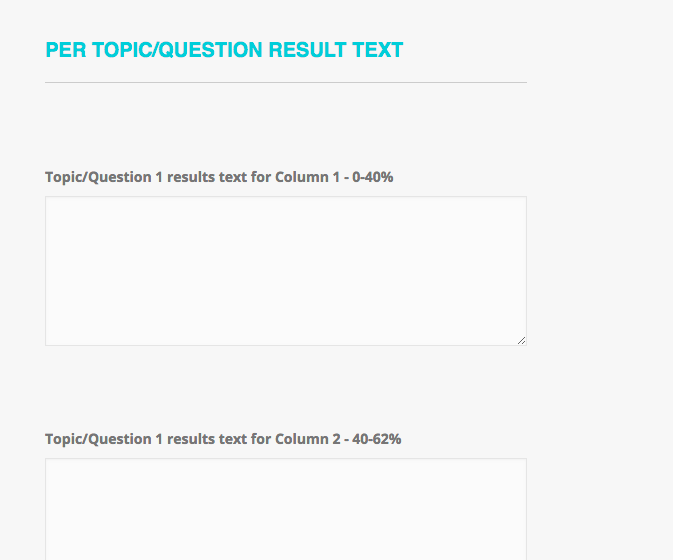
- Find the topic/question text for the particular score that you wish to modify (be careful not to delete any!), and click on the top down arrow to load up its options.
- Click on the “Advanced” tab.
- Edit the text as you see fit.
- Once you are done, press the “Update” button on the
right hand side of the screen.
How to edit the email consent text
- Start by navigating within your admin dashboard log in area and hover over “Quiz Forms” then click on “Forms” in the left-hand menu as pictured below.
- On the next screen, hover over the Quiz title and click onto “Edit”.
- Scroll down (about halfway down the screen) until you find the field called “Email Consent” and click on the top down arrow to load up its options.
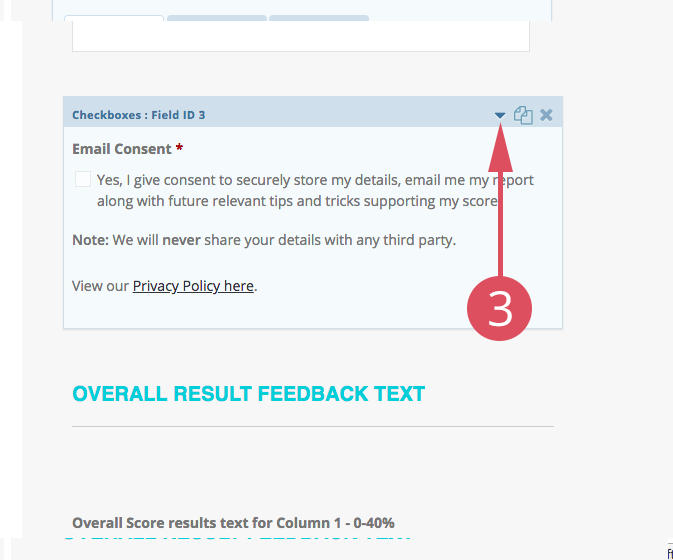
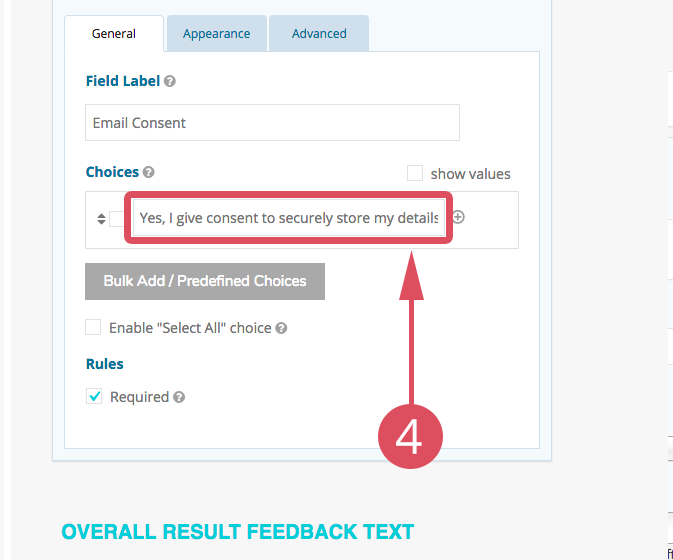
- You’ll see the text to edit under “Choices”.
- Once you are done, press the “Update” button on the
right hand side of the screen.
How to edit the PDF report
- Log into your quiz portal at https://smadigital.app/wp-admin
- In the left-hand menu, click on “Forms”.
- Hover your mouse over the form title. More options should appear. Hover over “Settings” and then click on “PDF”.
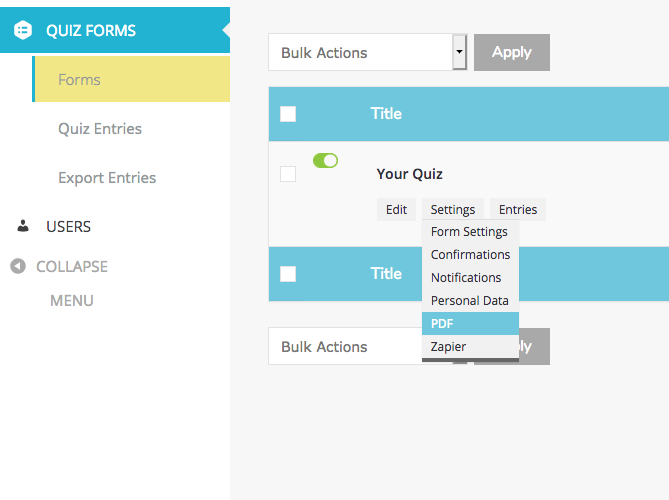
- Under “Report PDF” click the “Edit” button.
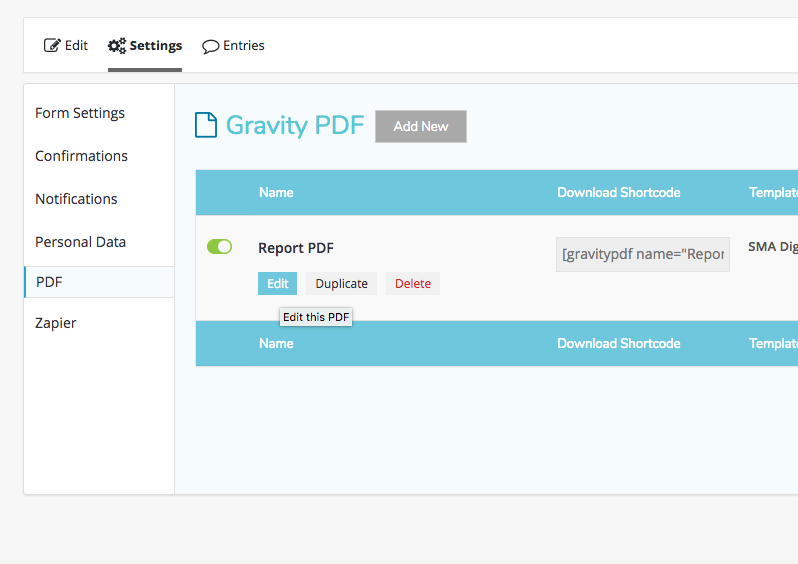
- There will be 4 tabs at the top starting with General. Click onto the “Template” tab.
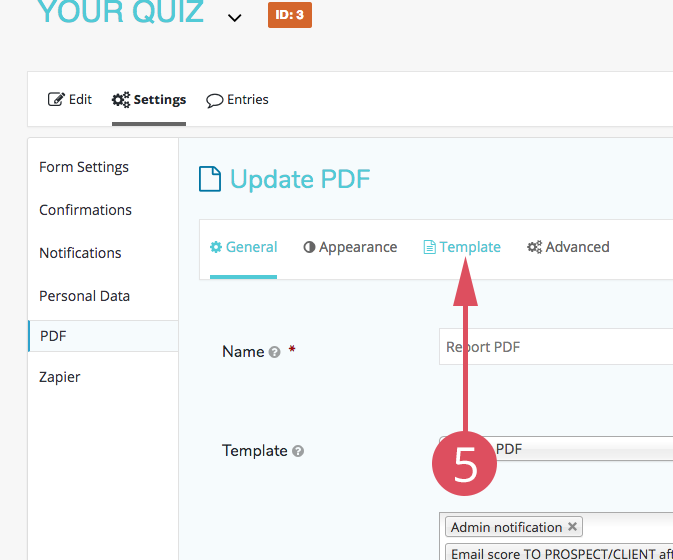
- You can then make edits as required. Once you are done, click on the “Update PDF” button at the bottom of the page.HINT: Once you make an update, you can view the change instantly by looking at your entries, and viewing an entry PDF.
How to edit email notifications
- Log into your quiz portal at https://smadigital.app/wp-admin
- In the left-hand menu, click on “Forms”.
- Hover your mouse over the form title. More options should appear. Hover over “Settings” and then click on “Notifications”.
- Select the notification you wish to edit. Edit it, and click SAVE.
Embedding & Promoting Your Quiz
How to embed my quiz on my website
- When you are logged into your quiz portal dashboard, there are two widgets on the
right hand side. - Under “Your Embed Code”, click on the green COPY button to copy the code to your clipboard.
- Edit a page on your website, and depending on the software you use for your website, you should paste the code into
a , text, or code view. Please ask your web designer if you get stuck or alternatively email us.html 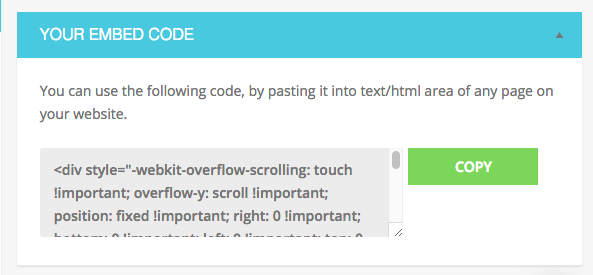
How to promote your quiz
- Check out our videos on the Quiz Masters Page with proven ways to promote your quiz.
How to send people to your quiz
NOTE: If you have embedded your quiz onto your website, ignore these steps and simply give people the URL of your website page.
- When you are logged into your quiz portal dashboard, there are two widgets on the
right hand side. - Under “Your Unique URL”, click on the green COPY button. This will copy the URL to your clipboard.
- You can then go to Edit -> Paste to paste the URL of your quiz link anywhere you wish.
